How to Change IP Address in BlueStacks: A Comprehensive Guide
Fast answer first. Then use the tabs or video for more detail.
- Watch the video explanation below for a faster overview.
- Game mechanics may change with updates or patches.
- Use this block to get the short answer without scrolling the whole page.
- Read the FAQ section if the article has one.
- Use the table of contents to jump straight to the detailed section you need.
- Watch the video first, then skim the article for specifics.
BlueStacks is a popular Android emulator that allows you to run mobile apps and games on your PC or Mac. While it’s generally straightforward to use, sometimes you might need to change your IP address within BlueStacks. There are several ways to achieve this, primarily using VPNs or proxy settings. Here’s a breakdown of the methods:
-
Using a VPN: This is the simplest and most recommended method. Download a VPN app directly within BlueStacks from the Google Play Store. Once installed and connected to a server, all traffic from BlueStacks, including your IP address, will be routed through the VPN server. This effectively changes your apparent IP address to that of the VPN server’s location.
-
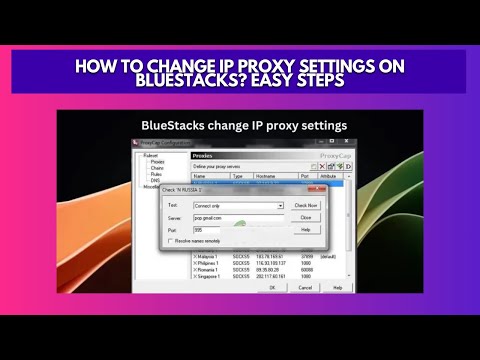
Using Proxy Settings: BlueStacks itself doesn’t offer native proxy settings. However, you can use third-party apps like v2rayNG within BlueStacks to configure proxy servers. This involves downloading the app, adding a proxy configuration file, selecting the proxy type, entering the proxy details (IP address, port, username, password), and then activating the proxy. This method is more technical but provides greater control over your proxy settings.
Let’s delve into each method with more detail, and then explore some frequently asked questions to ensure you have a complete understanding.
Method 1: Using a VPN Within BlueStacks
This is the most user-friendly and secure method to change your IP address in BlueStacks.
Steps:
-
Open BlueStacks on your PC or Mac.
-
Access the Google Play Store: Find the Google Play Store icon within BlueStacks and open it.
-
Download a VPN App: Search for a reputable VPN app like NordVPN, ExpressVPN, Surfshark, or any other VPN of your choice.
-
Install the VPN App: Install the selected VPN app directly within BlueStacks, just like you would on a regular Android device.
-
Launch the VPN App: Open the VPN app after installation.
-
Sign In or Create an Account: If you already have an account with the VPN provider, sign in. If not, you’ll need to create an account.
-
Connect to a VPN Server: Choose a server location from the VPN app’s server list. Connecting to a server in a different country will give you an IP address from that country.
-
Verify Your IP Address: After connecting to the VPN, you can verify your new IP address by opening a browser within BlueStacks (like Chrome) and searching for “What is my IP address?” Your IP address should now match the location of the VPN server you connected to.
Benefits of Using a VPN:
- Ease of Use: VPN apps are generally user-friendly and easy to set up.
- Security: VPNs encrypt your internet traffic, providing an extra layer of security.
- Privacy: VPNs mask your real IP address, protecting your online privacy.
- Access to Geo-Restricted Content: You can access content that is only available in certain regions by connecting to a VPN server in that region.
Method 2: Using Proxy Settings with v2rayNG
This method is more technical and involves using a third-party app called v2rayNG to configure proxy servers within BlueStacks.
Steps:
-
Download v2rayNG APK: Search for the v2rayNG APK file online and download it to your computer.
-
Install v2rayNG in BlueStacks: Drag and drop the downloaded APK file into the BlueStacks window. This will automatically install v2rayNG within BlueStacks.
-
Obtain Proxy Server Details: You will need the details of a proxy server, including the IP address, port, username (if required), and password (if required). You can obtain these details from a proxy provider.
-
Add a Proxy Configuration File: In v2rayNG, you’ll need to add a proxy configuration file. This usually involves importing a configuration file from a URL or manually entering the proxy details.
-
Select Proxy Type: Choose the appropriate proxy type (e.g., HTTP, SOCKS5) in v2rayNG.
-
Enter Proxy Details: Enter the proxy server’s IP address, port, username, and password in v2rayNG.
-
Activate the Proxy: Enable the proxy in v2rayNG to route your traffic through the proxy server.
-
Verify Your IP Address: After activating the proxy, verify your IP address by opening a browser within BlueStacks and searching for “What is my IP address?” Your IP address should now match the proxy server’s IP address.
Considerations for Using Proxy Settings:
- Technical Expertise: This method requires some technical knowledge of proxy servers and configuration.
- Proxy Server Reliability: The reliability and speed of your connection depend on the quality of the proxy server.
- Security Risks: Using free or untrusted proxy servers can pose security risks. Ensure you use a reputable proxy provider.
Important Note about BlueStacks IP Addresses
BlueStacks itself may use shared IP addresses. This means that multiple applications running on BlueStacks might share the same IP address, especially if they are using content delivery networks (CDNs). This is a normal behavior and doesn’t necessarily indicate any security issue. However, if you want to mask your actual IP address or access geo-restricted content, using a VPN or proxy is still necessary.
Frequently Asked Questions (FAQs)
Here are some frequently asked questions related to changing the IP address in BlueStacks:
-
Can I change the IP address of BlueStacks without using a VPN or proxy? No, directly changing the IP address within BlueStacks without using a VPN or proxy is not possible. BlueStacks uses the network connection of your host operating system (Windows or macOS).
-
Does changing my IP address in BlueStacks affect my host computer’s IP address? No, changing the IP address within BlueStacks using a VPN or proxy only affects the IP address seen by apps running within the emulator. Your host computer’s IP address remains unchanged.
-
Is it safe to use free VPNs with BlueStacks? While free VPNs are tempting, they often come with limitations and potential risks. They may have slower speeds, data caps, and may collect and sell your data. It’s generally recommended to use a reputable paid VPN service for better security and privacy.
-
How can I ensure that my VPN connection is working correctly within BlueStacks? After connecting to a VPN, open a browser within BlueStacks and search for “What is my IP address?”. The IP address displayed should match the location of the VPN server you connected to.
-
Can I use the same VPN account on both my host computer and BlueStacks? Yes, most VPN providers allow you to use the same account on multiple devices, including your host computer and BlueStacks. However, check your VPN provider’s terms of service to ensure you’re not exceeding the maximum number of allowed connections.
-
What are the best VPNs for BlueStacks? Some of the best VPNs for BlueStacks include NordVPN, ExpressVPN, Surfshark, CyberGhost, and Private Internet Access. These VPNs offer fast speeds, reliable connections, and strong security features.
-
How do I troubleshoot VPN connection issues in BlueStacks? If you’re experiencing VPN connection issues, try the following:
- Restart BlueStacks.
- Restart your VPN app.
- Try connecting to a different VPN server.
- Check your internet connection.
- Make sure your VPN app is up to date.
-
Can I use a proxy server with all apps in BlueStacks? When using v2rayNG or similar apps, the proxy settings will generally apply to all network traffic originating from within BlueStacks.
-
How do I find a reliable proxy server? You can find proxy servers by searching online for “proxy server lists.” However, be cautious when using free proxy servers, as they may not be reliable or secure. It’s recommended to use a paid proxy service from a reputable provider.
-
What is the difference between a VPN and a proxy server? A VPN encrypts all of your internet traffic and routes it through a secure server, providing both security and privacy. A proxy server, on the other hand, only routes your traffic through a different server but doesn’t necessarily encrypt your data.
-
Does changing my IP address in BlueStacks affect my ability to play online games? In most cases, changing your IP address shouldn’t affect your ability to play online games. However, some games may have region restrictions or IP address blocking policies.
-
How do I change my region in BlueStacks? Besides changing your IP address with a VPN, you can also change your location in BlueStacks by using the “Set location” feature, which can be accessed by pressing Ctrl + Shift + K or clicking the “Set location” icon on the Side Toolbar.
-
Can I create my own VPN server? Yes, it’s technically possible to create your own VPN server. However, this requires advanced technical knowledge and can be complex to set up and maintain.
-
Is it legal to use a VPN or proxy server? Using a VPN or proxy server is legal in most countries. However, some countries may have restrictions on their use. Be sure to check the laws in your country before using a VPN or proxy server.
-
Where can I learn more about using BlueStacks for educational purposes? For more information on integrating gaming and learning, check out the Games Learning Society website: https://www.gameslearningsociety.org/. They offer valuable resources and insights into the intersection of games and education.
Changing your IP address in BlueStacks can be useful for various reasons, such as accessing geo-restricted content, protecting your privacy, or bypassing IP address blocks. By following the steps outlined in this guide, you can easily change your IP address in BlueStacks using either a VPN or proxy server. Remember to choose a reputable VPN or proxy provider and to take appropriate security precautions to protect your data.