Necramech Weakness: A Comprehensive Guide to Takedown Tactics
Fast answer first. Then use the tabs or video for more detail.
- Watch the video explanation below for a faster overview.
- Game mechanics may change with updates or patches.
- Use this block to get the short answer without scrolling the whole page.
- Read the FAQ section if the article has one.
- Use the table of contents to jump straight to the detailed section you need.
- Watch the video first, then skim the article for specifics.
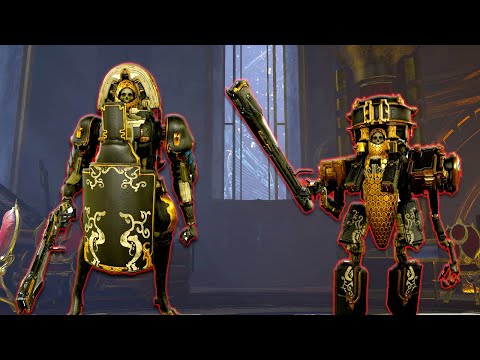
What is Necramech weakness? The primary Necramech weakness lies in their exposed back and the specific vulnerabilities related to their abilities. While heavily armored, strategic players can exploit gaps in their defenses by flanking them or utilizing damage type vulnerabilities, primarily Radiation and Viral damage, to inflict significant damage. Targeting the back is generally the most effective strategy, as it provides a significant damage multiplier.
Understanding Necramechs in Warframe
Necramechs are powerful, ancient Warframes, offering immense firepower and resilience. Initially encountered in the Heart of Deimos quest, they are formidable foes. However, like any enemy in Warframe, they have weaknesses that can be exploited to turn the tide of battle. Knowing these weaknesses is crucial for efficient farming and successful mission completion.
Necramech Armor and Health
Necramechs are built tough, primarily relying on Alloy Armor and a substantial amount of health. Alloy Armor is particularly resistant to Puncture and Slash damage, meaning relying solely on these damage types will result in longer and more challenging encounters. As such, understanding alternative damage types and tactical approaches is crucial.
Exploiting Necramech Weaknesses: The Tactics
While brute force can work, strategic exploitation of Necramech weaknesses greatly accelerates the process of defeating these powerful enemies. Here’s a detailed breakdown:
Targeting the Back
The most significant weakness of a Necramech is its exposed back. Attacking from behind provides a substantial damage multiplier. This is the fundamental tactic for efficient Necramech takedowns. Maneuvering to gain access to the back is key, often requiring agility or strategic use of cover.
Damage Type Vulnerabilities: Radiation and Viral
Necramechs are particularly susceptible to Radiation and Viral damage types. Radiation is effective against their Alloy Armor, bypassing some of its inherent resistance. Viral damage reduces their maximum health, making subsequent attacks even more potent. Combining these damage types or using weapons that inherently deal them is highly recommended.
Ability Disruption
Certain Warframe abilities can significantly disrupt Necramechs. Crowd control abilities that can stun, disarm, or otherwise incapacitate the Necramech create openings for focused attacks on their weak spots. Examples include Warframes like Rhino, with his Stomp ability, or crowd control focused Warframes like Vauban.
Taking Advantage of Environmental Hazards
Deimos often features environmental hazards that can be used to your advantage. Luring a Necramech into a hazardous area, such as a pool of corrosive liquid or a trap, can provide an opportunity for additional damage or temporary incapacitation. While not always directly damaging, such tactics can buy precious time to reposition and attack the back.
Using Voidrig Abilities Strategically
If you are using your own Voidrig Necramech, utilizing its abilities correctly against enemy Necramechs is critical. The Voidrig’s Guard Mode provides significant damage reduction, allowing you to withstand attacks while lining up shots on the enemy’s back. Its Arquebex is a powerful weapon that can deal massive damage, especially when targeting weaknesses.
Weapon Selection for Necramech Combat
Choosing the right weapon significantly impacts your effectiveness against Necramechs. Weapons that deal Radiation or Viral damage are highly recommended.
Primary Weapons
- Ignis Wraith: A flamethrower that deals Heat damage, which can then be combined with Toxin damage for Viral. Its wide area of effect is also beneficial for dealing with Deimos’s swarming enemies.
- Tenet Envoy: This rocket launcher deals significant damage and has a high status chance, making it excellent for applying Radiation or Viral.
- Kuva Nukor: A beam weapon with high status chance and inherent Heat damage, perfect for creating Viral combinations. Its chain reaction can also damage multiple enemies simultaneously.
Secondary Weapons
- Epitaph: Its charged shot deals guaranteed Impact and Heat procs, which can be combined with Toxin for Viral.
- Kuva Nukor: (again!) Its chaining effect is very useful in applying status effects quickly.
- Sporelacer: This kitgun deals Mutagen damage by default, and can be modded to output large amount of Viral damage.
Melee Weapons
While generally riskier, melee weapons with high status chance and appropriate elemental combinations can be effective, especially when combined with crowd control abilities. Look for weapons that can apply Viral or Radiation consistently. Mods like Condition Overload can further enhance melee damage based on applied status effects.
General Tips for Fighting Necramechs
- Stay Mobile: Necramechs are slow but hit hard. Keep moving to avoid their attacks.
- Use Cover: Utilize the environment to shield yourself from incoming fire while repositioning.
- Focus Fire: Coordinate with your team to concentrate fire on a single Necramech at a time.
- Adapt: Adjust your strategy based on the Necramech’s abilities and the environment.
Frequently Asked Questions (FAQs)
1. Does armor stripping work on Necramechs?
Yes, armor stripping abilities from Warframes like Ember or abilities from weapons can significantly reduce the Necramech’s Alloy Armor, making them more vulnerable to subsequent attacks. Fully stripping the armor is ideal for maximizing damage output.
2. Which Warframes are best for fighting Necramechs?
Warframes that excel in crowd control, damage amplification, or armor stripping are particularly effective. Rhino, Ember, Vauban, and Octavia are strong choices due to their abilities to control, weaken, or significantly damage Necramechs.
3. What mods are essential for fighting Necramechs?
Mods that increase Radiation or Viral damage, improve status chance, and enhance overall weapon damage are crucial. Corrosive Projection (Aura mod) for armor stripping also helps significantly.
4. Is it worth using a Necramech against another Necramech?
Yes, using your own Necramech, particularly the Voidrig, is a viable and often efficient strategy. Utilize its Guard Mode for defense and the Arquebex for high damage output, focusing on the enemy Necramech’s back.
5. How do I obtain a Necramech?
Necramechs are obtained through the Heart of Deimos questline. Blueprints for the damaged Necramech can be acquired in isolation vaults on Deimos and repaired using resources found on the same planet.
6. Can I use Archwing weapons against Necramechs?
While technically possible, Archwing weapons are generally less effective than conventional weapons against Necramechs. It is better to utilize the mobility of your archwing to get behind the Necramech.
7. What is the best way to deal with Necramech’s Mortar Barrage attack?
The best way to counter the mortar barrage attack is to use cover, such as buildings or terrain features. Alternatively, Warframes with abilities that grant invulnerability or damage reduction can mitigate the damage. Quick movement and awareness of the incoming projectiles are also crucial.
8. Does the Necramech’s Shield have any weaknesses?
The Necramech’s shield is susceptible to the Magnetic damage type. However, focusing on its armor and health is generally more efficient than trying to deplete its shield, especially given the effectiveness of Radiation and Viral damage.
9. Are there specific Necramech variants with different weaknesses?
No, the fundamental weaknesses remain consistent across different Necramech variants. Targeting the back and utilizing Radiation/Viral damage are always effective strategies, regardless of the specific Necramech type.
10. How do I get behind a Necramech easily?
Using Warframes with high mobility or abilities that allow for quick repositioning is helpful. Utilizing your operator’s Void Dash can also provide a quick burst of speed to flank the Necramech.
11. Is it better to use a high fire rate weapon or a single shot weapon against Necramechs?
It depends on your build and preferences. High fire rate weapons are good for applying status effects, while single-shot weapons with high damage are ideal for burst damage. Both can be effective when targeting weaknesses.
12. Can I use pets or companions effectively against Necramechs?
Pets or companions can provide support by applying status effects or drawing aggro. However, they are often vulnerable to Necramech attacks, so prioritize their survivability with appropriate mods.
13. What role do Rivens play in Necramech battles?
Rivens can significantly enhance weapon damage and status chance, making weapons with good Riven dispositions even more effective against Necramechs. Look for Rivens that boost critical damage, status chance, or specific elemental damage types.
14. How do I handle multiple Necramechs at once?
Prioritize crowd control and focus fire. Use Warframe abilities to incapacitate or debuff multiple Necramechs simultaneously, then concentrate your team’s damage on one target at a time.
15. What resources are most valuable to farm on Deimos for Necramech building and upgrades?
Common resources like Ferrite and Rubedo are frequently used. However, more crucial components like Necrathene, Alloy Plates, and damaged Necramech parts are essential for crafting Necramechs and their weapons. These are primarily found in Isolation Vaults.